
October 29, 2019 ( last updated : October 28, 2019 )
RabbitMQ Cluster
RabbitMQ
erlang
erlang.cookie
elixir
https://github.com/gridgentoo/osquery
RabbitMQ is an open source message-broker software that originally implemented the AMQP (Advanced Message Queuing Protocol) protocol, and while it has been developed and extended in order to support other protocols such as STOMP (Streaming Text Oriented Messaging Protocol), and MQTT (Message Queuing Telemetry Transport).
A message-queueing / message-broker software is used for sending and receiving messages between distributed systems, applications, and services. RabbitMQ is written in the Erlang programming language, it offers support for client interfaces and libraries for all major programming languages including Python, NodeJS, Java, PHP etc..
In this tutorial, I will show you how to set up a RabbitMQ Cluster on Ubuntu 18.04 Server. I will install a RabbitMQ Cluster using three Ubuntu servers, enable the RabbitMQ Management, and Setup the HA policy for all nodes.
In this step, we will edit the '/etc/hosts' file on all servers and map each server IP address as a hostname.
Edit the '/etc/hosts' file using vim editor.
sudo vim /etc/hostsNow paste the following configuration there.
10.0.15.21 lab-ubuntu01
10.0.15.22 lab-ubuntu02
10.0.15.23 lab-ubuntu03
Save and exit.
Before installing RabbitMQ server, make sure all repositories are updated.
Run the following command.
sudo apt update
sudo apt upgrade
Now install the RabbitMQ server packages from the Ubuntu repository using the apt command below.
sudo apt install rabbitmq-server -yAnd after the installation is complete, start the RabbitMQ service and enable it to launch everytime at system boot.
sudo systemctl start rabbitmq-server
sudo systemctl enable rabbitmq-server
The RabbitMQ Server has been installed on Ubuntu 18.04.
In this step, we will enable RabbitMQ management plugins. It's an interface that allows you to monitor and handle RabbitMQ server from the web browser, running on the default TCP port '15672' .
Enable the RabbitMQ management plugins by running the command below.
sudo rabbitmq-plugins enable rabbitmq_managementMake sure there is no error, then restart the RabbitMQ service.
sudo systemctl restart rabbitmq-serverRabbitMQ Management plugins have been enabled.
In this tutorial, we will enable the Ubuntu UFW firewall. We need to open some ports that will be used by the RabbitMQ server.
Add the ssh service to the UFW firewall and enable the firewall service.
sudo ufw allow ssh
sudo ufw enable
Now add new RabbitMQ tcp ports '5672,15672,4369,25672'.
sudo ufw allow 5672,15672,4369,25672/tcpThen check the UFW firewall ports list.
sudo ufw statusThe Ubuntu UFW firewall configuration has been completed, and we're ready to set up the RabbitMQ Cluster.
In order to setup the RabbitMQ cluster, we need to make sure the .erlang.cookie'' file is same on all nodes. We will copy the '.erlang.cookie' file on the '/var/lib/rabbitmq' directory from 'lab-ubuntu01' to other node 'lab-ubuntu02' and 'lab-ubuntu03' .
Copy the '.erlang.cookie' file using scp commands from the 'lab-ubuntu01' .
scp /var/lib/rabbitmq/.erlang.cookie root@lab-ubuntu02:/var/lib/rabbitmq/
scp /var/lib/rabbitmq/.erlang.cookie root@lab-ubuntu03:/var/lib/rabbitmq/
Make sure there is no error on both servers.
Next, we need to setup lab-ubuntu02' and <'lab-ubuntu03' to join the cluster 'lab-ubuntu01' .
Note:
Restart the RabbitMQ service and stop the app.
sudo systemctl restart rabbitmq-server
sudo rabbitmqctl stop_app
Now let RabbitMQ server on both nodes join the cluster on 'lab-ubuntu01', then start the app.
sudo rabbitmqctl join_cluster rabbit@lab-ubuntu01
sudo rabbitmqctl start_app
When it's complete, check the RabbitMQ cluster status.
sudo rabbitmqctl cluster_statusAnd you will get the results as below.
The RabbitMQ Cluster has been created, with lab-ubuntu01, lab-ubuntu02, and lab-ubuntu03 as members.
In this tutorial, we will create a new admin user for our RabbitMQ server and delete the default 'guest' user. We will be creating a new user from 'lab-ubuntu01', and it will be automatically replicated to all nodes on the cluster.
Add a new user named 'lab' with password 'qwerty123'.
sudo rabbitmqctl add_user lab qwerty123Setup the 'lab' user as an administrator.
sudo rabbitmqctl set_user_tags lab administratorAnd grant the 'lab' user permission to modify, write, and read all vhosts.
sudo rabbitmqctl set_permissions -p / lab ".*" ".*" ".*"Now delete the default 'guest' user.
sudo rabbitmqctl delete_user guestAnd check all available users.
sudo rabbitmqctl list_usersAnd you will get the result as below.
A new RabbitMQ administrator user has been created, and the default 'guest' user is deleted.
By default, contents of a queue within a RabbitMQ cluster are located on a single node (the node on which the queue was declared).
This setup is must, we need to configure the 'ha policy' cluster for queue mirroring and replication to all cluster nodes. If the node that hosts queue master fails, the oldest mirror will be promoted to the new master as long as it synchronized, depends on the 'ha-mode' and 'ha-params' policies.
Below some example about RabbitMQ ha policies.
Setup ha policy named 'ha-all' which all queues on the RabbitMQ cluster will be mirroring to all nodes on the cluster.
sudo rabbitmqctl set_policy ha-all ".*" '{"ha-mode":"all"}'Setup ha policy named 'ha-two' which all queue name start with 'two.' will be mirroring to the two nodes on the cluster.
sudo rabbitmqctl set_policy ha-two "^two\." \
   '{"ha-mode":"exactly","ha-params":2,"ha-sync-mode":"automatic"}'
Setup a high availability policy named 'ha-nodes' which will contain all queues where the name starts with 'nodes.' We will be mirroring to two specific nodes 'lab-ubuntu02' and 'lab-ubuntu03' in the cluster.
sudo rabbitmqctl set_policy ha-nodes "^nodes\." \
   '{"ha-mode":"nodes","ha-params":["rabbit@lab-ubuntu02", "rabbit@lab-ubuntu03"]}'
RabbitMQ list ha policies.
sudo rabbitmqctl list_policies;RabbitMQ delete specific ha policy.
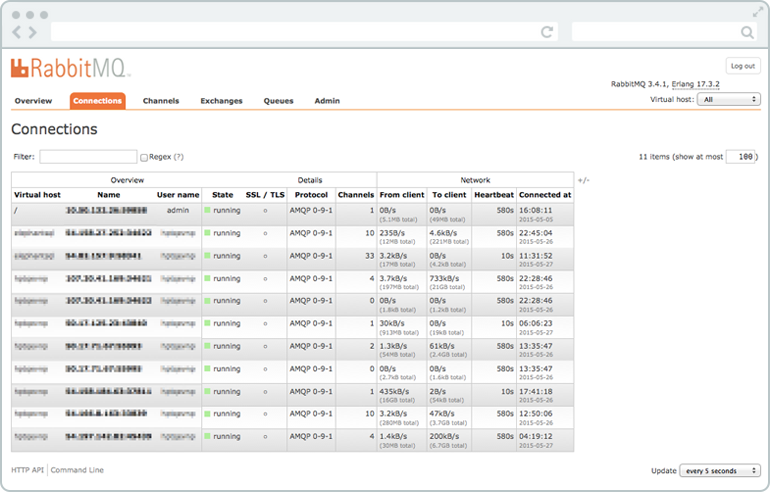
sudo rabbitmqctl clear_policy ha-twoOpen your web browser and type the IP address of the node with port '15672'.
http://10.0.15.21:15672/
Type the username 'lab' with password 'qwerty123'.
And you will get the RabbitMQ admin dashboard as shown below.
The installation and configuration of RabbitMQ Cluster on Ubuntu 18.04 servers have been completed successfully.
Reference
Originally published October 29, 2019
Latest update October 28, 2019
Related posts :