
October 30, 2019 ( last updated : October 29, 2019 )
Kubernetes Docker Cluster
Kubernetes
Docker
HDP
Hortonworks
Hortonworks Data Platform
Kerberos
Ambari
Hadoop cluster
Apache Ranger
Apache Knox Gateway
Ranger
Knox
Hadoop REST API
REST API
Apache Atlas
Atlas
ZooKeeper
ZooKeeper Cluster
in-memory
https://github.com/gridgentoo/zookeeper-release
Kubernetes is an open source platform for managing containerized applications developed by Google. It allows you to manage, scale, and automatically deploy your containerized applications in the clustered environment. With Kubernetes, we can orchestrate our containers across multiple hosts, scale the containerized applications with all resources on the fly, and have centralized container management environment.
In this tutorial, I will show you step-by-step how to install and configure Kubernetes on CentOS 7. We will be using 1 server 'k8s-master' as the Kubernetes Host Master, and 2 servers as Kubernetes node, 'node01' and 'node02'.
In this first step, we will prepare those 3 servers for Kubernetes installation, so run all commands on the master and node servers.
We will prepare all servers for Kubernetes installation by changing the existing configuration on servers, and also installating some packages, including docker-ce and kubernetes itself.
Configure Hosts
Edit hosts file on all server using the vim editor.
vim /etc/hostsPaste the host's list below.
10.0.15.10      k8s-master
10.0.15.21      node01
10.0.15.22      node02
Save and exit.
In this tutorial, we will not cover about SELinux configuration for Docker, so we will disable it.
Run the command below to disable SELinux.
setenforce 0
sed -i --follow-symlinks 's/SELINUX=enforcing/SELINUX=disabled/g' /etc/sysconfig/selinuxThe br_netfilter module is required for kubernetes installation. Enable this kernel module so that the packets traversing the bridge are processed by iptables for filtering and for port forwarding, and the kubernetes pods across the cluster can communicate with each other.
Run the command below to enable the br_netfilter kernel module.
modprobe br_netfilter
echo '1' > /proc/sys/net/bridge/bridge-nf-call-iptables
Disable SWAP for kubernetes installation by running the following commands.
swapoff -aAnd then edit the '/etc/fstab' file.
vim /etc/fstabComment the swap line UUID as below.
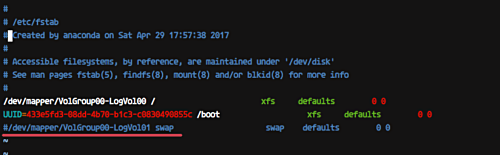
Install the latest version of Docker-ce from the docker repository.
Install the package dependencies for docker-ce.
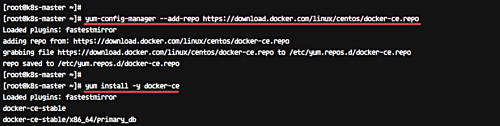
yum install -y yum-utils device-mapper-persistent-data lvm2Add the docker repository to the system and install docker-ce using the yum command.
yum-config-manager --add-repo https://download.docker.com/linux/centos/docker-ce.repo
yum install -y docker-ce
Wait for the docker-ce installation.
Add the kubernetes repository to the centos 7 system by running the following command.
cat <<EOF > /etc/yum.repos.d/kubernetes.repo
[kubernetes]
name=Kubernetes
baseurl=https://packages.cloud.google.com/yum/repos/kubernetes-el7-x86_64
enabled=1
gpgcheck=1
repo_gpgcheck=1
gpgkey=https://packages.cloud.google.com/yum/doc/yum-key.gpg
        https://packages.cloud.google.com/yum/doc/rpm-package-key.gpg
EOF
Now install the kubernetes packages kubeadm, kubelet, and kubectl using the yum command below.
yum install -y kubelet kubeadm kubectl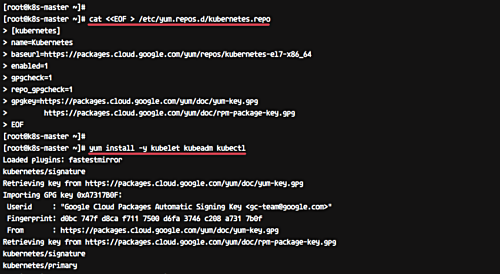
After the installation is complete, restart all those servers.
sudo rebootLog in again to the server and start the services, docker and kubelet.
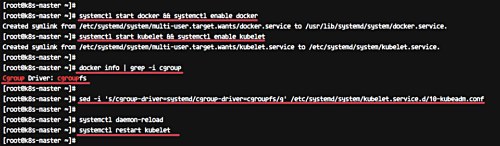
systemctl start docker && systemctl enable docker
systemctl start kubelet && systemctl enable kubeletWe need to make sure the docker-ce and kubernetes are using same 'cgroup'.
Check docker cgroup using the docker info command.
docker info | grep -i cgroupAnd you see the docker is using 'cgroupfs' as a cgroup-driver.
Now run the command below to change the kuberetes cgroup-driver to 'cgroupfs'.
sed -i 's/cgroup-driver=systemd/cgroup-driver=cgroupfs/g' /etc/systemd/system/kubelet.service.d/10-kubeadm.confReload the systemd system and restart the kubelet service.
systemctl daemon-reload
systemctl restart kubelet
Now we're ready to configure the Kubernetes Cluster.
In this step, we will initialize the kubernetes master cluster configuration.
Move the shell to the master server 'k8s-master' and run the command below to set up the kubernetes master.
kubeadm init --apiserver-advertise-address=10.0.15.10 --pod-network-cidr=10.244.0.0/16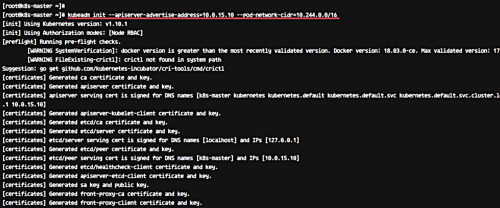
Note:
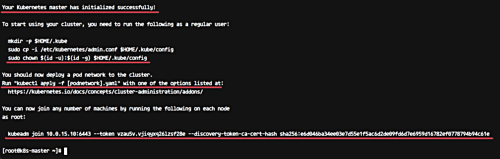
When the Kubernetes initialization is complete, you will get the result as below.
Note:
Copy the 'kubeadm join ... ... ...' command to your text editor. The command will be used to register new nodes to the kubernetes cluster.
Now in order to use Kubernetes, we need to run some commands as on the result.
Create new '.kube' configuration directory and copy the configuration 'admin.conf'.
mkdir -p $HOME/.kube
sudo cp -i /etc/kubernetes/admin.conf $HOME/.kube/config
sudo chown $(id -u):$(id -g) $HOME/.kube/config
Next, deploy the flannel network to the kubernetes cluster using the kubectl command.
kubectl apply -f https://raw.githubusercontent.com/coreos/flannel/master/Documentation/kube-flannel.yml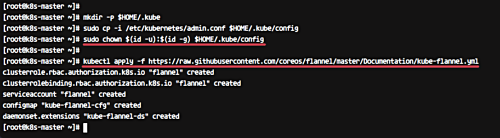
The flannel network has been deployed to the Kubernetes cluster.
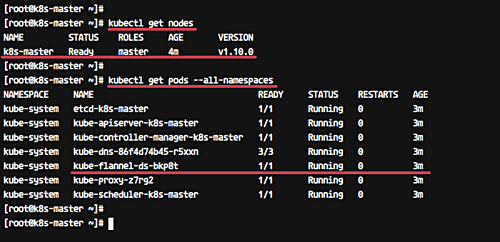
Wait for a minute and then check kubernetes node and pods using commands below.
kubectl get nodes
kubectl get pods --all-namespaces
And you will get the 'k8s-master' node is running as a 'master' cluster with status 'ready', and you will get all pods that are needed for the cluster, including the 'kube-flannel-ds' for network pod configuration.
Make sure all kube-system pods status is 'running'.
Kubernetes cluster master initialization and configuration has been completed.
In this step, we will add node01 and node02 to join the 'k8s' cluster.
Connect to the node01 server and run the kubeadm join command as we copied on the top.
kubeadm join 10.0.15.10:6443 --token vzau5v.vjiqyxq26lzsf28e --discovery-token-ca-cert-hash sha256:e6d046ba34ee03e7d55e1f5ac6d2de09fd6d7e6959d16782ef0778794b94c61e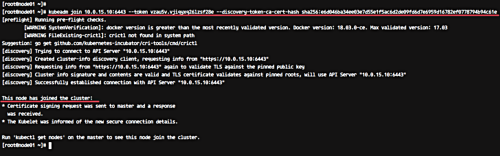
Connect to the node02 server and run the kubeadm join command as we copied on the top.
kubeadm join 10.0.15.10:6443 --token vzau5v.vjiqyxq26lzsf28e --discovery-token-ca-cert-hash sha256:e6d046ba34ee03e7d55e1f5ac6d2de09fd6d7e6959d16782ef0778794b94c61e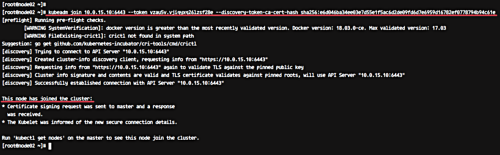
Wait for some minutes and back to the 'k8s-master' master cluster server check the nodes and pods using the following command.
kubectl get nodes
kubectl get pods --all-namespaces
Now you will get node01 and node02 has been added to the cluster with status 'ready'.
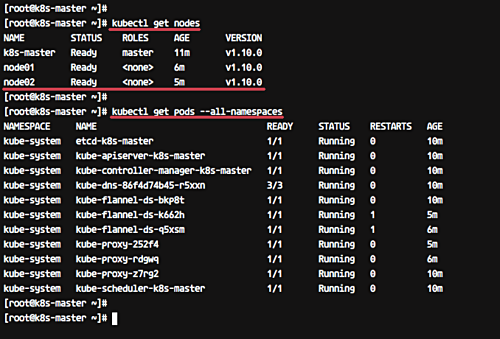
node01 and node02 have been added to the kubernetes cluster.
In this step, we will do a test by deploying the Nginx pod to the kubernetes cluster. A pod is a group of one or more containers with shared storage and network that runs under Kubernetes. A Pod contains one or more containers, such as Docker container.
Login to the 'k8s-master' server and create new deployment named 'nginx' using the kubectl command.
kubectl create deployment nginx --image=nginxTo see details of the 'nginx' deployment sepcification, run the following command.
kubectl describe deployment nginxAnd you will get the nginx pod deployment specification.
Next, we will expose the nginx pod accessible via the internet. And we need to create new service NodePort for this.
Run the kubectl command below.
kubectl create service nodeport nginx --tcp=80:80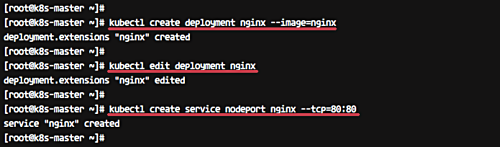
Make sure there is no error. Now check the nginx service nodeport and IP using the kubectl command below.
kubectl get pods
kubectl get svc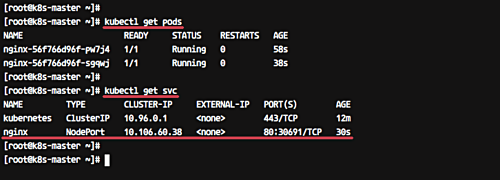
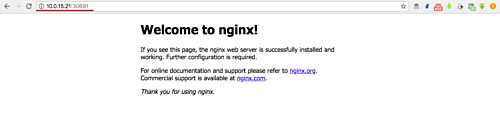
Now you will get the nginx pod is now running under cluster IP address '10.160.60.38' port 80, and the node main IP address '10.0.15.x' on port '30691'.
From the 'k8s-master' server run the curl command below.
curl node01:30691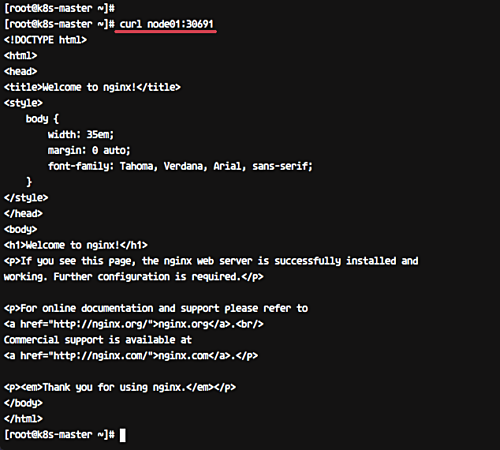
curl node02:30691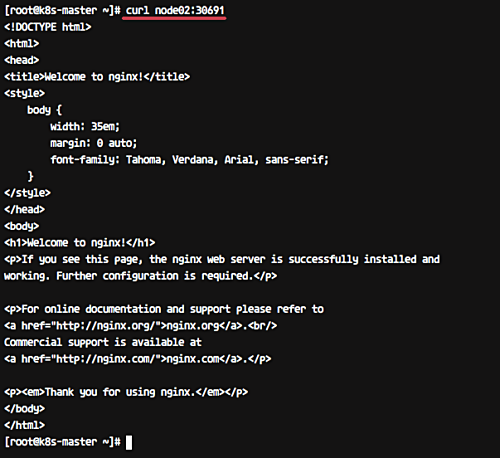
The Nginx Pod has now been deployed under the Kubernetes cluster and it's accessible via the internet.
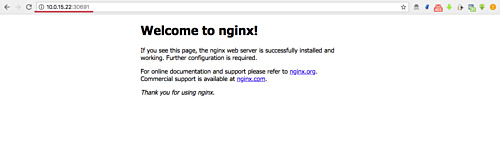
Now access from the web browser.
http://10.0.15.10:30691/And you will get the Nginx default page.
On the node02 server - http://10.0.15.11:30691/
The Kubernetes cluster Installation and configuration on CentOS 7 has been completed successfully.
######################################################################################################Reference
Originally published October 30, 2019
Latest update October 29, 2019
Related posts :