
October 29, 2019 ( last updated : October 28, 2019 )
CockroachDB Cluster
CockroachDB
HDP
Hortonworks
Hortonworks Data Platform
Kerberos
Ambari
Hadoop cluster
Apache Ranger
Apache Knox Gateway
Ranger
Knox
Hadoop REST API
REST API
Apache Atlas
Atlas
ZooKeeper
ZooKeeper Cluster
in-memory
https://github.com/gridgentoo/cockroach
CockroachDB is a cloud-native SQL database for building global, scalable cloud services. CockroachDB is an open source and cloud-native SQL database developed by the CockroachLabs. It's a distributed SQL database built on the transactional and key-value store. CockroachDB is scalable SQL database which has been compared to Google Spanner database. It's based on the PostgreSQL protocol wire and production ready.
In this tutorial, we will show you how to set up the Secure CockroachDB Cluster on Ubuntu 18.04. You will learn how to set up the secure cluster, access the CockroachDB admin dashboard, create a new user on CockroachDB, create and show database on CockroachDB.
######################################################################################################In order to run the CockroachDB Cluster, we need multiple servers. And we will be using three Ubuntu 18.04 servers with the detail hostname and IP address as below.
Firstly, we must keep the time between servers on the cluster synchronized. So, we need to install the NTP package on all servers. And for this guide, we will be using chrony.
Install chrony package to all servers using the following command.
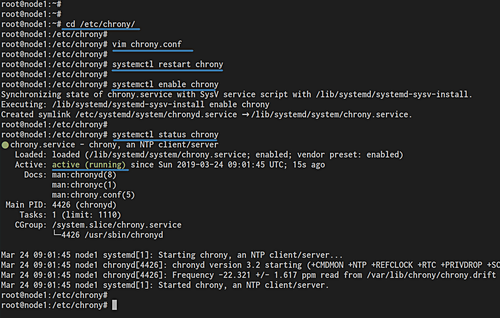
sudo apt install chrony -yOnce the installation is complete, goto '/etc/chrony/' configuration directory and edit the file 'chrony.conf'.
cd /etc/chrony/
vim chrony.conf
Delete the default NTP pool and replace with your own country pool.
pool 0.id.pool.ntp.org iburst maxsources 4
pool 1.id.pool.ntp.org iburst maxsources 1
pool 2.id.pool.ntp.org iburst maxsources 1
pool 3.id.pool.ntp.org iburst maxsources 2
Save and close.
Now restart the chrony service and then add chrony to the startup service.
systemctl restart chrony
systemctl enable chrony
As a result, the time between servers will be synchronized to the same NTP pool servers.
In this step, we will download and install the CockroachDB on all servers. So, run all commands on all of your cluster servers.
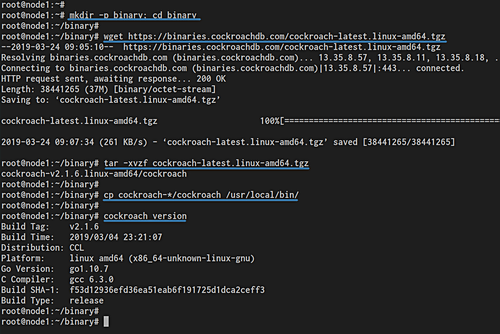
Create a new directory called 'binary' and got into it.
mkdir -p binary; cd binaryDownload the compressed cockroachdb binary file for Linux and extract it.
wget https://binaries.cockroachdb.com/cockroach-latest.linux-amd64.tgz
tar -xvzf cockroach-latest.linux-amd64.tgz
Now copy the 'cockroach' binary file to the '/etc/local/bin' directory.
cp cockroach-*/cockroach /usr/local/bin/After that, you can run the 'cockroach' command and explore the basic command for help, check the version etc.
cockroach versionThe CockroachDB has been installed on all servers.
Now we're going to generate some certificates to secure the CockrouchDB Cluster. We can use OpenSSL or the cockroach command line for generating certificate files.
We will generate the CA certificate and key, and the generate certificate for user root and certificate for each node on the cluster.
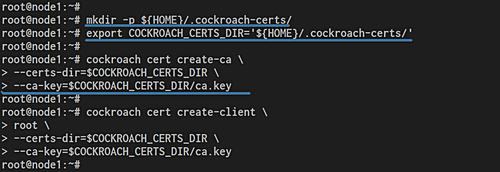
Create the certificate directory '~/.cockroach-certs' and the environment variable for it.
mkdir -p ${HOME}/.cockroach-certs/
export COCKROACH_CERTS_DIR='${HOME}/.cockroach-certs/'
Create CA and Copy to All Nodes
On the 'node1' server, create the certificate authority using the cockroach command below.
cockroach cert create-ca \
 --certs-dir=$COCKROACH_CERTS_DIR \
 --ca-key=$COCKROACH_CERTS_DIR/ca.key
And you will get the 'ca.key' and 'ca.crt' on the '~/.cockroach-certs' directory.
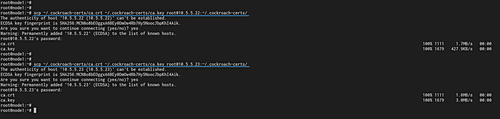
After that, copy the ca certificate and key to all servers using the scp command as below.
Copy to the 'node2' server.
scp ~/.cockroach-certs/ca.crt ~/.cockroach-certs/ca.key root@10.5.5.22:~/.cockroach-certs/Copy to the 'node3' server.
scp ~/.cockroach-certs/ca.crt ~/.cockroach-certs/ca.key root@10.5.5.23:~/.cockroach-certs/Now make sure the CA certificate and key are uploaded to all host servers.
Create Client Certificates
After creating the certificate authority, we need to generate the client certificate. The client certificate will be used to secure communication between the built-in SQL shell and the cluster.
Generate the client certificate on all servers using the following cockroach command.
cockroach cert create-client \
 root \
 --certs-dir=$COCKROACH_CERTS_DIR \
 --ca-key=$COCKROACH_CERTS_DIR/ca.key
And you will get client certificates for user root 'client.root.crt' and 'client.root.key'.

Create Server Certificates
Server certificates will be used to secure communication between servers on the CockroachDB cluster. And in order to join the secure cluster, you need to generate server certificates for each server.
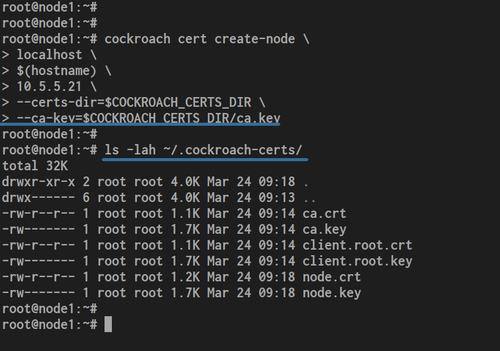
On the 'node1', create the server certificate using the following command.
cockroach cert create-node \
 localhost \
 $(hostname) \
 10.5.5.21 \
 --certs-dir=$COCKROACH_CERTS_DIR \
 --ca-key=$COCKROACH_CERTS_DIR/ca.key
Change the IP address with your own.
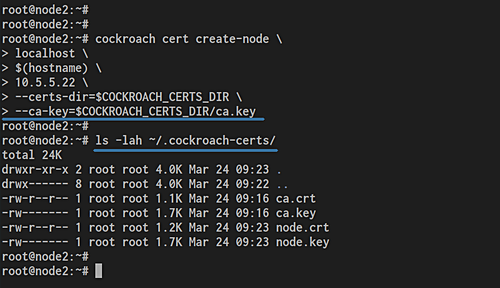
On the 'node2', create the server certificate using the following command.
cockroach cert create-node \
 localhost \
 $(hostname) \
 10.5.5.22 \
 --certs-dir=$COCKROACH_CERTS_DIR \
 --ca-key=$COCKROACH_CERTS_DIR/ca.key
Change the IP address with your own.
On the 'node3', create the server certificate using the following command.
cockroach cert create-node \
 localhost \
 $(hostname) \
 10.5.5.23 \
 --certs-dir=$COCKROACH_CERTS_DIR \
 --ca-key=$COCKROACH_CERTS_DIR/ca.key
Change the IP address with your ow
Now you will get server certificates 'node.crt' and 'node.key' on the '~/.cockroach-certs' directory.
After creating some SSL certificates, we will initialize the Secure CockroachDB Cluster from the 'node1' server.
Run the following command on the 'node1' server.
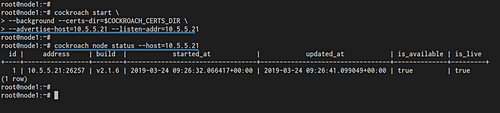
cockroach start \
 --background --certs-dir=$COCKROACH_CERTS_DIR \
 --advertise-host=10.5.5.21 --listen-addr=10.5.5.21
Ensure there is no error.
After that, check the cluster node status by running the cockroach command below.
cockroach node status --host=10.5.5.21You will get the node1 with IP address 10.5.5.21 is up and running with CockroachDB v2.1.6.
Next, we will add the 'node2' and 'node3' to the CockroachDB secure cluster.
Ensure the CA and server certificate is on the ~/.cockroach-certs directory.
ls -lah ~/.cockroah-certs/Now run the following command to add the 'node2' with IP address 10.5.5.22. Add it to the CockroachDB cluster.
cockroach start \
 --background --certs-dir=$COCKROACH_CERTS_DIR \
 --advertise-host=10.5.5.22 --listen-addr=10.5.5.22 \
 --join=10.5.5.21:26257
Once it's complete, go to the 'node3' and run the following command.
cockroach start \
 --background --certs-dir=$COCKROACH_CERTS_DIR \
 --advertise-host=10.5.5.23 --listen-addr=10.5.5.23 \
 --join=10.5.5.21:26257
Change the IP address with your own.
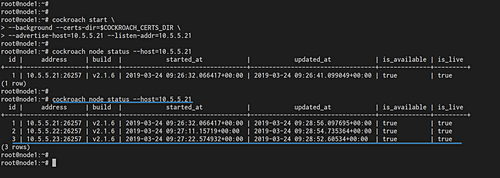
Now the 'node2' and 'node3' has been added to the Secure CockroachDB Cluster. Check it from the 'node1' server using the following command.
cockroach node status --host=10.5.5.21And you will get three different servers is up and running the cockroach v2.1.6.
For this last step, we will test our CockroachDB Secure Cluster installation by accessing the admin dashboard and testing the database replication between servers.
Testing CockroachDB Dashboard
The CockroachDB provides beautiful dashboard UI to monitor the cluster. Open your web browser and type the server IP address followed by the port 8080.
https://10.5.5.21:8080/And you will get the CockroachDB login page as below.
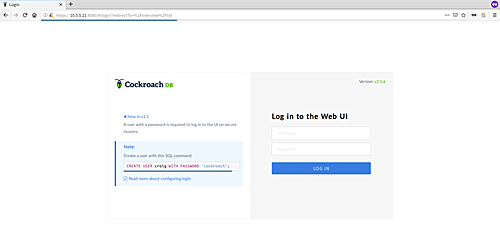
In order to log in to the dashboard, we need to create a user on the CockroachDB database.
Back to your 'node1' terminal and log in to the cockroachdb SQL shell using the following command.
cockroach sql --certs-dir=$COCKROACH_CERTS_DIR \
 --host=10.5.5.21
Now create a new user called 'xakep' with password 'xakep-labs123@#' using the query below.
CREATE USER xakep WITH PASSWORD 'xakep-labs123@#';Type '\q' to exit from the CockroachDB SQL shell.
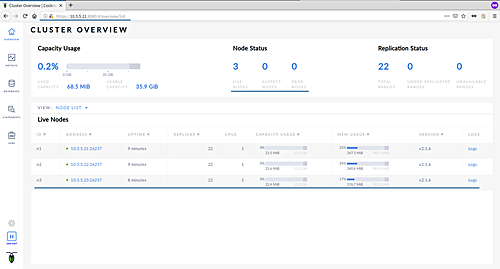
show users;Now back to the web browser and type the user 'xakep' with password 'xakep-labs123@#' on the login page and click the Login button.
And you will get the CockroachDB admin dashboard as below.
Testing Database Replication
Now we're going to test the database replication between servers on the CockroachDB Cluster by creating the database on the 'node1' and checking the database from 'node2' or 'node3'.
On the 'node1', access the CockroachDB SQL shell using the following command.
cockroach sql --certs-dir=$COCKROACH_CERTS_DIR \
--host=10.5.5.21create database xakepdb;
create database xakepdb2;Now print database list and make sure you get two databases that we just created.
show databases;Next, login to the 'node2' server and access the CockroachDB SQL shell using the following command.
cockroach sql --certs-dir=$COCKROACH_CERTS_DIR \
 --host=10.5.5.22
Check the database list.
show databases;And you will get 'xakepdb' and 'xakepdb2' has been replicated to the 'node2' server.
And finally, the installation and configuration of Secure CockroachDB Cluster using Ubuntu 18.04 has been completed successfully.
##############################################################################################################Reference
Originally published October 29, 2019
Latest update October 28, 2019
Related posts :